Move Out Cleaning for a Fresh Start: How to Leave Your Property Spotless
Move out cleaning is one of the most important tasks before handing back a rental, selling a home, or closing a chapter in a property you once called your own. Whether you are a tenant aiming to secure your deposit, a landlord preparing for new occupants, or a homeowner wanting to make a strong impression, a thorough move out cleaning can make all the difference.
This process goes far beyond a quick tidy-up. It includes deep cleaning every room, removing built-up grime, restoring freshness, and making the space look ready for its next chapter. Done well, move out cleaning saves time, reduces stress, and helps you avoid costly deductions or delays.
In this article, you’ll learn what move out cleaning includes, why it matters, which areas need the most attention, and how to approach the task efficiently. You’ll also find practical tips, checklists, and smart planning advice to help you complete the job with confidence.
What Is Move Out Cleaning?
Move out cleaning is a detailed cleaning process performed when someone is leaving a property. It is designed to return the home to a clean, presentable condition, often matching the standards expected in a lease agreement or real estate sale. Unlike regular cleaning, this type of cleaning focuses on neglected areas, hidden dust, interior surfaces, and spaces that are often overlooked during everyday upkeep.
Depending on the property and the condition it was left in, move out cleaning may include scrubbing appliances, wiping baseboards, removing stains, cleaning windows, and disinfecting bathrooms. The goal is not just visual appeal; it is also about leaving behind a hygienic, well-maintained environment.
Many people choose to handle move out cleaning themselves, while others prefer to book your service now with professionals who can handle the process faster and more thoroughly. Either way, the standard is usually higher than routine housekeeping, so planning ahead is essential.
Why Move Out Cleaning Matters

There are several reasons why move out cleaning should be treated as a priority. The first and most obvious is financial. For tenants, leaving the property in poor condition can lead to deductions from a security deposit. For landlords, a clean space helps attract new renters faster. For sellers, a spotless home can create a stronger first impression and support a smoother closing process.
Beyond money, move out cleaning creates a sense of closure. Moving can be stressful and chaotic, and completing a proper cleaning routine helps you leave on good terms. It also respects the people coming in after you, whether they are new owners, renters, or property managers.
Another important factor is compliance. Many rental agreements include cleaning clauses that require the property to be returned in a specific condition. Failing to meet these expectations can lead to disputes, delays, or extra fees. A proper move out cleaning helps avoid those issues and gives everyone peace of mind.
Key Benefits at a Glance
- Helps protect your security deposit
- Improves the property’s presentation
- Reduces stress during a move
- Supports compliance with lease requirements
- Makes the handover process smoother
Preparing for Move Out Cleaning
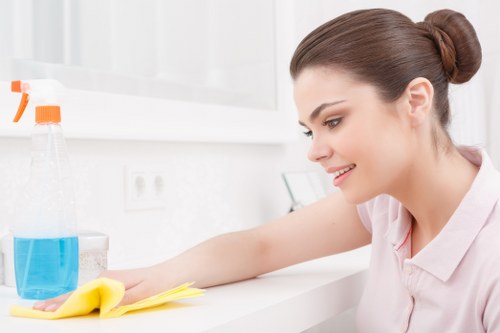
Preparation is the foundation of an efficient move out cleaning process. Before you begin, it helps to sort your belongings, remove furniture, and clear out all personal items. A clutter-free space allows you to clean more thoroughly and avoid missing hidden areas like corners, shelves, and the backs of cabinets.
Create a plan based on the rooms in the property. Start with a checklist so nothing gets overlooked. If possible, gather all supplies in advance, including microfiber cloths, all-purpose cleaner, disinfectant, sponges, glass cleaner, a vacuum, mop, scrub brushes, and garbage bags. Having everything ready saves time and reduces interruptions.
It is also wise to check your lease or sale agreement before starting. Some properties require specific cleaning tasks, such as carpet shampooing, oven cleaning, or professional window washing. Knowing these requirements beforehand can help you avoid last-minute problems and make your move out cleaning more effective.
Smart Preparation Tips
- Empty the property room by room
- Sort trash, donations, and items to keep
- Inspect the property for damage or problem areas
- Read lease or buyer requirements carefully
- Set aside enough time for detailed cleaning
Room-by-Room Move Out Cleaning Checklist
A successful move out cleaning plan works best when broken down room by room. This makes the process more manageable and helps ensure that every area receives the attention it needs. Below is a practical approach to cleaning the most common parts of a home or apartment.
Kitchen
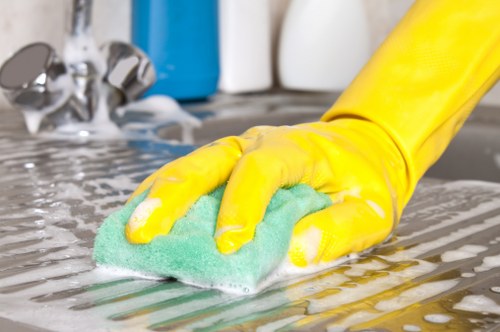
The kitchen usually requires the most effort during move out cleaning. Grease, food residue, and appliance buildup can be difficult to remove if left too long. Focus on the stove, oven, refrigerator, microwave, countertops, sink, cabinets, backsplash, and floors. Empty cabinets and wipe down all shelves inside and out.
- Clean inside and outside of the refrigerator
- Degrease oven surfaces and stovetop burners
- Wipe cabinet doors and handles
- Scrub the sink and faucet
- Mop the floor thoroughly
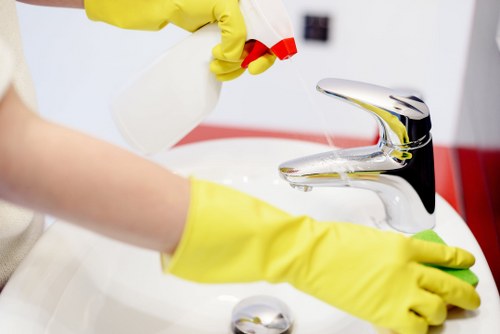
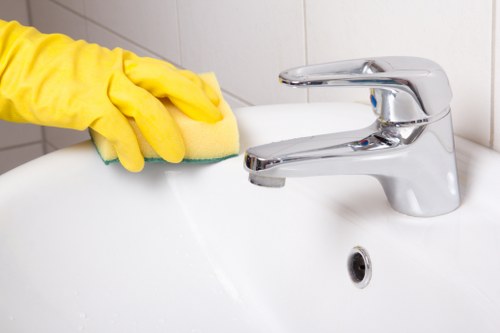
Bathrooms
Bathrooms need careful sanitizing during move out cleaning. Remove soap scum, limescale, toothpaste residue, and mold where present. Clean mirrors, sinks, toilets, tubs, showers, tiles, and fixtures. Pay special attention to corners and grout lines where dirt often accumulates.
- Disinfect toilet surfaces and base areas
- Scrub shower walls and tubs
- Polish mirrors and fixtures
- Clean drains and remove hair buildup
- Wipe cabinets and drawers inside
Living Room and Bedrooms
For living rooms and bedrooms, the focus is on dust removal, floor cleaning, and surface care. Dust ceiling fans, vents, shelves, baseboards, and light fixtures. Vacuum carpets and clean under furniture if it has not already been removed. If the floors are hard surface, mop them after vacuuming or sweeping.
Extra Attention Areas
Some areas are easy to forget during move out cleaning, but they can make a big difference in the final result. These include window tracks, door frames, light switches, closet shelves, air vents, and behind appliances. Even if the property looks clean at first glance, these details can affect the final inspection.
Baseboards should be wiped down throughout the home, as they collect dust and scuff marks over time. Walls may need spot cleaning if there are fingerprints, marks, or smudges. Windows and glass doors should be cleaned for clarity and shine. Don’t forget to remove cobwebs from ceiling corners and thoroughly clean entryways.
If your property has a laundry area, garage, balcony, or storage closet, include those in your move out cleaning schedule as well. These spaces are commonly missed but still matter in a final walkthrough.
Often Overlooked Details
- Behind and beneath appliances
- Inside closets and storage spaces
- Light switches and outlet covers
- Window ledges and blinds
- Door handles, trim, and frames
DIY Move Out Cleaning vs Professional Cleaning
When deciding how to handle move out cleaning, many people weigh the pros and cons of doing it themselves versus hiring professionals. Both options can work well, depending on your schedule, budget, and the condition of the property.
DIY move out cleaning can save money, especially if the property is relatively clean and you already have the tools needed. It gives you full control over the process and allows you to clean at your own pace. However, it also requires time, energy, and attention to detail—resources that are often limited during a move.
Professional move out cleaning is often the best choice if you are short on time, moving long distance, or dealing with a property that needs deep cleaning. A trained cleaning team usually works faster and knows how to handle stubborn dirt, built-up grime, and hard-to-reach areas. If you want a smoother handoff, contact us today or book your service now to save time and reduce stress.
DIY or Professional: Which Is Right for You?
- Choose DIY if the property is small and lightly used
- Choose professional help if the home needs deep cleaning
- Consider your time before the move-out deadline
- Check whether your lease requires professional carpet cleaning
- Factor in the risk of deposit deductions or inspection issues
Common Mistakes to Avoid During Move Out Cleaning
Even with a solid plan, some mistakes can reduce the effectiveness of move out cleaning. One of the most common issues is waiting until the last minute. Rushing usually leads to missed spots, half-finished tasks, and unnecessary stress. Starting early gives you time to clean properly and revisit problem areas if needed.
Another mistake is focusing only on what is visible. While surfaces may look clean from a distance, property managers and buyers often inspect inside cabinets, behind toilets, under sinks, and along trim. Skipping these details can lead to disappointing results.
Using the wrong products is another concern. Harsh chemicals can damage floors, countertops, or appliances, while weak products may not remove tough buildup. Always test cleaners when needed and choose products suited to the material you are cleaning. A careful move out cleaning approach protects both the property and your reputation.
Other Mistakes to Watch For
- Forgetting to remove trash and leftovers
- Leaving appliances uncleaned
- Ignoring odors from drains or bins
- Not checking the final result in daylight
- Failing to follow lease-specific cleaning rules
How Move Out Cleaning Helps Secure a Deposit
For renters, move out cleaning often has a direct connection to deposit recovery. Landlords and property managers typically inspect the home after the tenant leaves, and cleanliness is one of the first things they notice. If the property is returned in good condition, the chances of a full or partial deposit return improve significantly.
However, cleanliness is only one part of the equation. Damage, stains, missing items, and lease violations may also affect the final outcome. That said, a thorough move out cleaning shows responsibility and helps prevent avoidable deductions related to dirt, odors, or neglected maintenance.
To maximize your chances, use a checklist, document the cleaning process with photos, and leave the property in the best possible condition. If carpets, ovens, or windows require special attention, handling them properly can make a major difference during the inspection.
Deposit-Friendly Cleaning Priorities
- Remove all trash and personal belongings
- Deep clean bathrooms and kitchen surfaces
- Vacuum and mop all floors
- Eliminate odors and visible stains
- Replace any items that the lease requires
Best Time to Schedule Move Out Cleaning
Timing matters when it comes to move out cleaning. Ideally, the cleaning should happen after all furniture and boxes are removed but before the final inspection or key handover. This gives you unrestricted access to all surfaces and allows for a more complete job.
If you are hiring professionals, schedule the service close enough to move-out day that the property stays clean, but not so late that delays create problems. For DIY cleaning, divide the work over several days if possible. For example, tackle the kitchen one day, bathrooms the next, and bedrooms after that. Breaking up the work can make move out cleaning more manageable and less overwhelming.
For larger homes or busy moving schedules, booking early is always smart. This helps secure your preferred time slot and ensures you have enough time for any final touch-ups. A well-timed move out cleaning keeps the transition smooth and organized.
Timing Tips
- Clean after moving out belongings
- Leave time for final touch-ups
- Schedule professional service early
- Allow for inspection-ready finishing details
- Plan around key return deadlines
Move Out Cleaning Tips for Better Results
To get the best outcome from move out cleaning, work from top to bottom and from one side of the room to the other. This approach helps prevent dust and debris from falling onto already-cleaned surfaces. Start with ceiling fixtures, fans, and shelves, then move to walls, counters, and floors.
Use microfiber cloths for dusting because they trap particles better than ordinary rags. For stubborn buildup, let cleaning solutions sit for a few minutes before scrubbing. This makes the process more efficient and reduces the effort required to remove grime. When cleaning glass and mirrors, use streak-free methods for a polished finish.
It is also helpful to ventilate the property while cleaning. Open windows if possible and allow fresh air to circulate. This reduces odors and helps surfaces dry faster. Good airflow can make a noticeable difference in how fresh the property feels after move out cleaning.
Practical Tips
- Work room by room to stay organized
- Use a checklist to track progress
- Let cleaning products sit before scrubbing
- Focus on touchpoints like handles and switches
- Finish with a final walkthrough in natural light
Final Thoughts on Move Out Cleaning
Move out cleaning is more than a finishing task—it is part of leaving a property in good condition and starting the next chapter on the right note. Whether you are trying to protect a deposit, prepare a home for sale, or simply show respect for the next occupants, a detailed cleaning process matters.
By planning ahead, following a room-by-room checklist, and paying attention to the hidden details, you can complete move out cleaning with less stress and better results. And if the job feels too large to handle alone, professional help can make the process easier and faster.
Take the time to do it right, and the payoff will be worth it. A clean handover creates a positive final impression, supports smoother transitions, and helps you move forward with confidence. Contact us today or book your service now if you want to make your move-out process cleaner, easier, and more efficient.